Creating, configuring and managing relations between issues is the key feature of STAGIL Assets - Advanced Links for Jira. Relations are connecting two custom fields and therefore two issues, which contain the connected fields. Connecting issues that way offers you many possible use cases, which will be covered in the course of this documentation. As there are lots of possibilities, we will focus on the main ones, such as CMDB, CRM and HR.
The main idea of all use cases is to show information with their relation(s) between each other, for example linking devices like laptops, monitors and mobile phones to the belonging person (CMDB use case) or connecting contact data to an organization (CRM). Relations can be configured and shown in graphs/panels/tables. These topics are covered in the following sections.
Create a Relation
Go to the app administration and choose “Relations”. Click “Add Relation” to create a new relation:

Now you have the following configuration options:
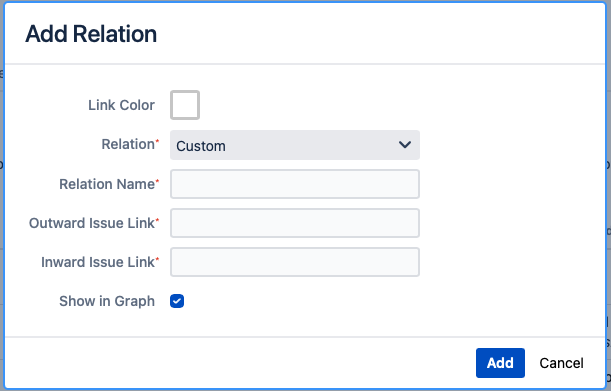
Link Color: Color of your relation if they are displayed in graphs.
Relation: Link type of your relation. Choose “Custom” to create a new link type (standard use case of STAGIL Assets!).
Relation Name: Name to identify your relation.
Outward Issue Link: Imagine 2 issues A and B. The outward link is the direction from A → B.
Inward Issue Link: The inward link is the opposite direction from B → A.
Example Relation: You want to connect CIs with their costs. Your relation name is “CI - Cost”. So you have the outward link named “paid by” which will link the cost issues. Vice versa you have the inward link named “Payment for” which will link the costs with the CI.

Set Screens
To make your relation work you have to set screens for the relation fields you created in the first step. Going back to our example relation this means that we have to place our field “Paid by” in the screen(s) for the issue type “CI” and the field “Payment for” for the issue type “Cost”. This way we link two issue types by linking two custom fields.
Configure a Relation
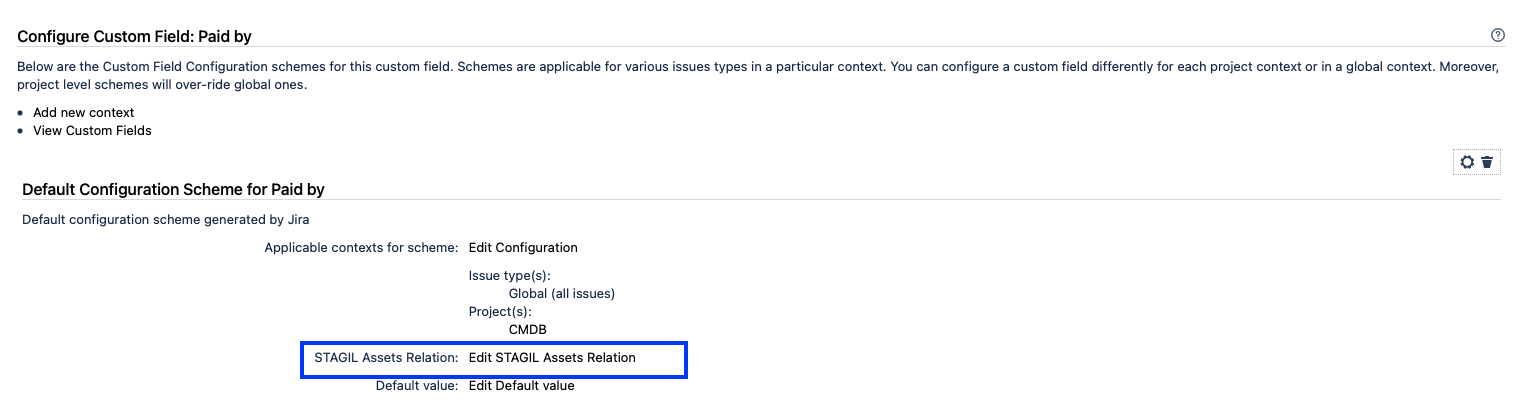
Until now your relation is not more than an empty structure. We will fill it with data in the next step. Click on the inward/outward link names to proceed with the configuration:

Now choose “Edit STAGIL Assets Relation”:
Data Logic
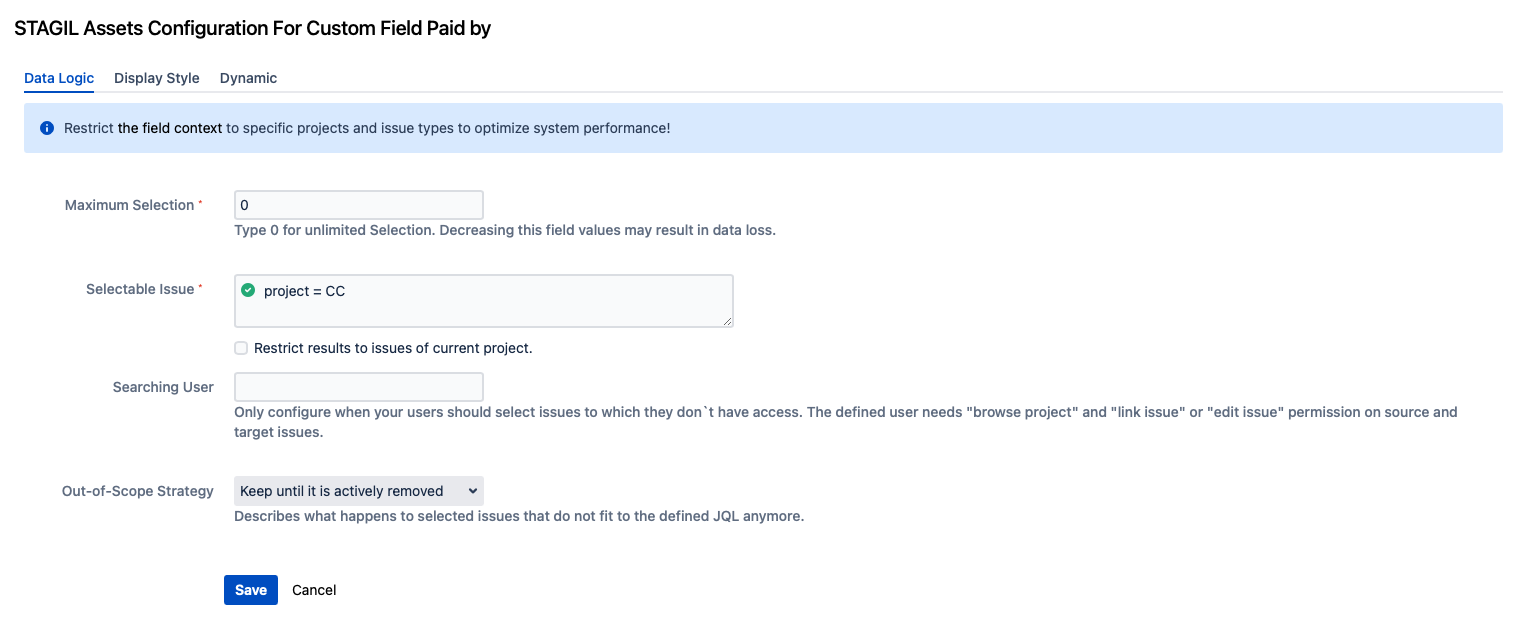
Maximum Selection
Fill in the number of issues you should allow to select in this field. You can type 1 for single selection or any positive integer for multiple selections. Type 0 if you want a multi-select field with an unlimited selection.
Selectable Issues
Type JQL for the scope of issue the user should see for selection.
You can also define a Searching User here, to define other views. You could use this if you want to have a selection for a user over issues he/she normally cannot see because of View Permission / Issue Security. So user can select this issues, but can not see them, if they click on the link.
With Out-of-Scope Strategy you can define, what to do, if you have selected issues in some fields, that doesn't fit the JQL anymore. You can choose between Keep until it is actively removed by the user or Remove on next update automatically.
Display Style
By defining the display style you can configure the look of your relation fields in the issue view.
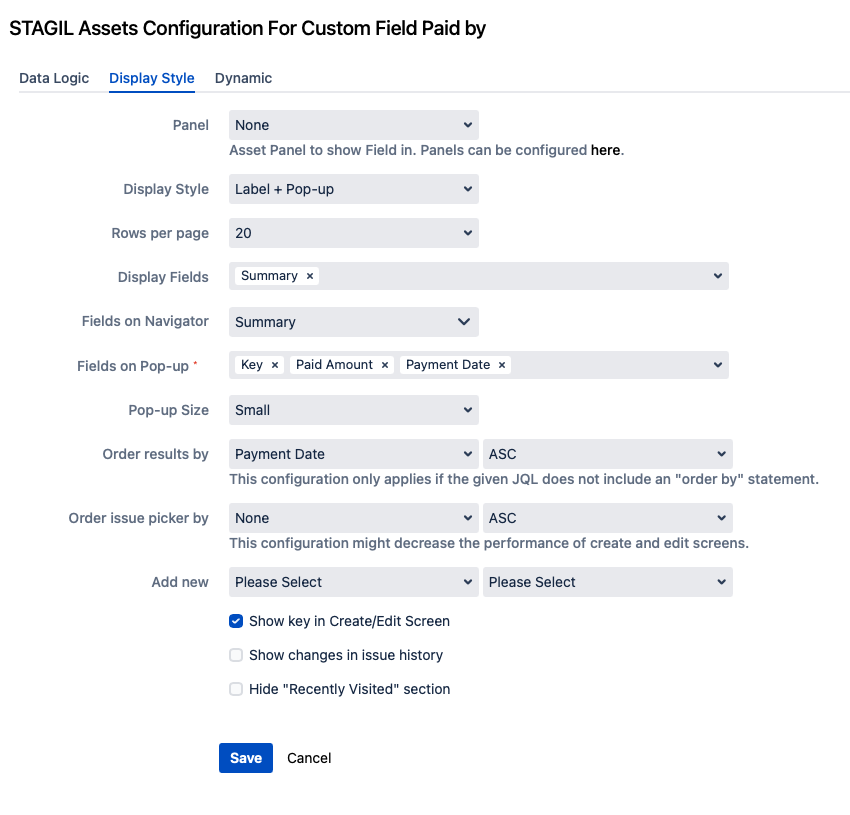
Panel: The position where your lookup panel should appear.
Display Style: table, list, table + pop-up, label + pop-up
Search Bar: Provides a search above your panel. Available options are JQL search or text search.
Display Fields: Fields that should be displayed in your panel.
Fields on Navigator: Fields that should be displayed in the issue navigator.
Fields on Pop-up: Fields that appear on the pop-up in case this option is selected above.
Add new: When you choose the display style "Table", you can allow users to create new assets directly at the table in the issue view. To enable this feature, please choose the project and the issue type that should be pre-selected in the create new issue screen that will appear after the user clicks on the small plus icon above the table.

Show key in edit/create screen: If you mark this checkbox you can see the summary and additionally the key of the related issue you have selected in the edit and the create screen of your issue.
Example with key + summary (unchecking the option would only show “Start Enterprise”):

Show changes in issue history: If you select this checkbox the changes in an issue, like add or remove issue in relation custom field, will be shown in issue history.
Dynamic
In this tab you can select subsets of your configured amount of assets you chose in the Data Logic tab and assign it to issue types. So it is possible to have a different list of assets for selection in issues. Also you can make use of dynamic dependencies and define, which conditions have to be met, that your field appears in your masks. This is useful, if you only want to select assets if they match specific criteria.
Please notice that the JQL in the dynamic tab is a subset of the amount in the Data Logic tab. Otherwise you will not get any matches.
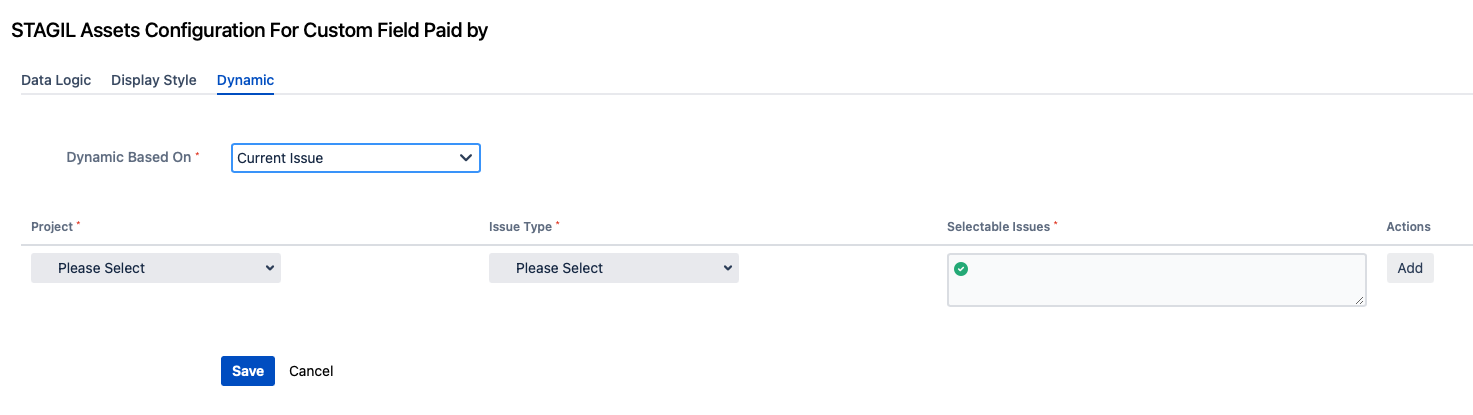
Dynamic Based on Current Issue
To create a subset of your assets, fill in Project, Issue Type and a JQL to define selectable issues. You can define more than one subset, so that the same field will show different subsets of assets in different contexts.
Dynamic Based on Relation
With relation based dynamics you can define conditions for your field to appear in a mask. Only if the conditions are true, your relation field will pop up in your masks. To set conditions and selectable issues, please fill in a Condition JQL and a JQL for Selectable Issues.

Example
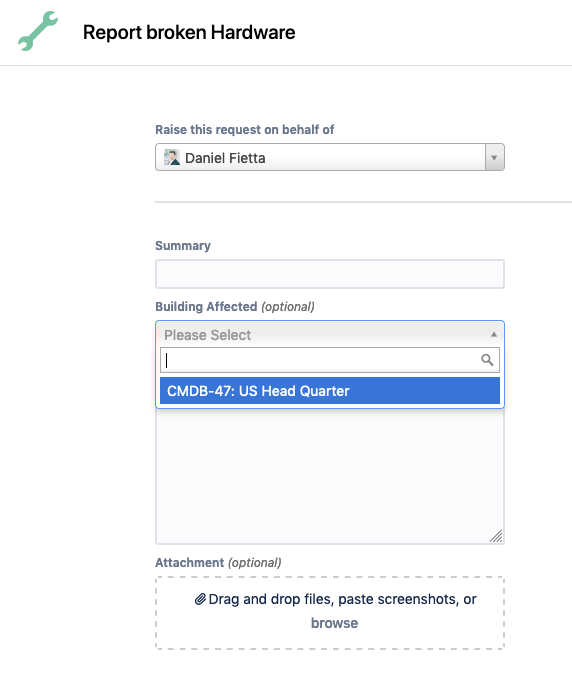
A user wants to send a request of a problem of one of the asset he owns via the Service Desk customer portal. When he creates a ticket, he has the possibility to select a building and a CMDB. The following example shows how to limit the option with dynamics to the building where the employee is stationed and the assets which belong to him.
The building where he is working
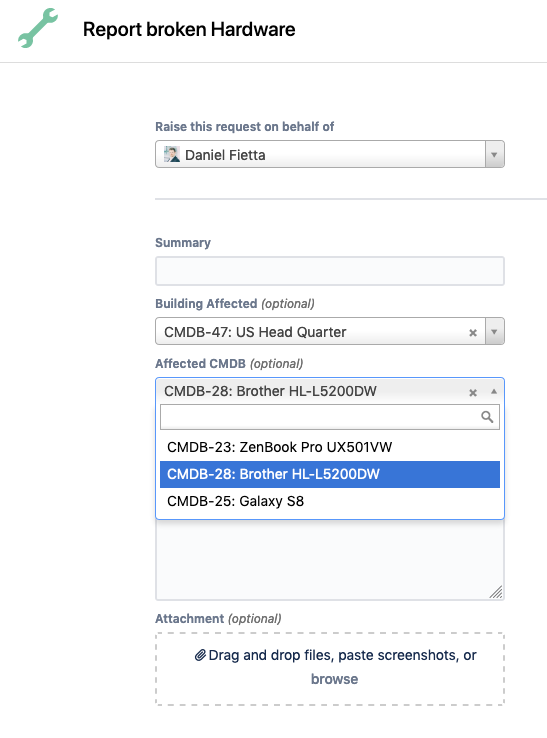
The assets which are assigned to him:
For the configuration, the following relations (Outward Field / Inward Field) need to be created which could be named like this:
ITSMSupport-Building ((Building Affected / Related Asset Tickets)
ITSMSupport-CMDB (Affected CMDB / Related Tickets)
Further, following relations are needed for the
Dynamic of ITSM-Support: Building-CMDB (Located CMDBs / In Building)
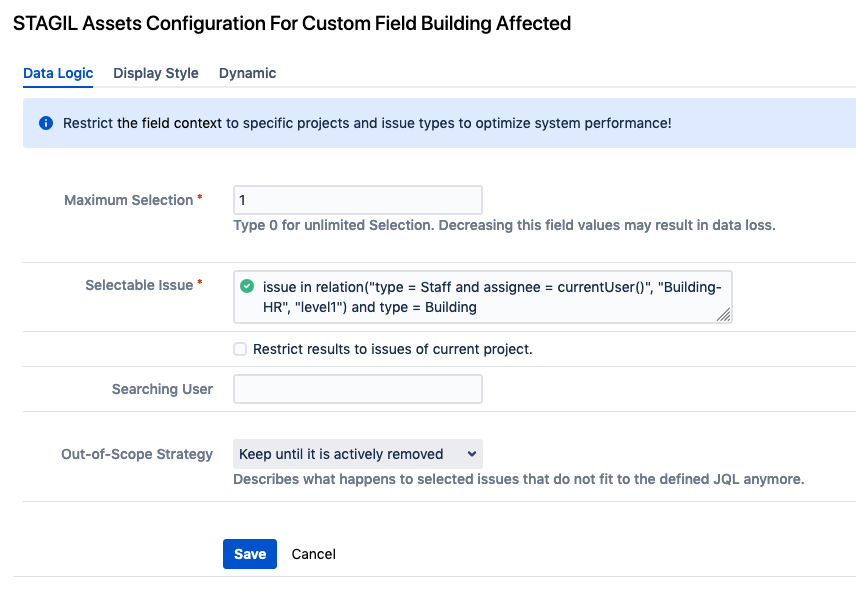
Data Logic of Building Affected: Building-HR (Located Staff / Job Site):
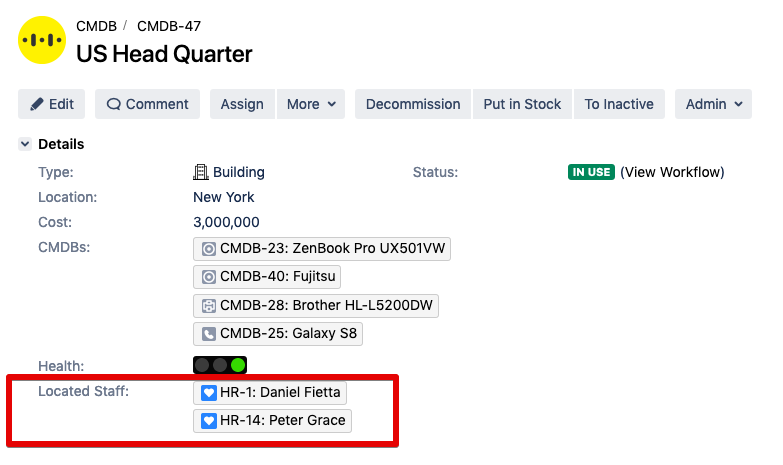
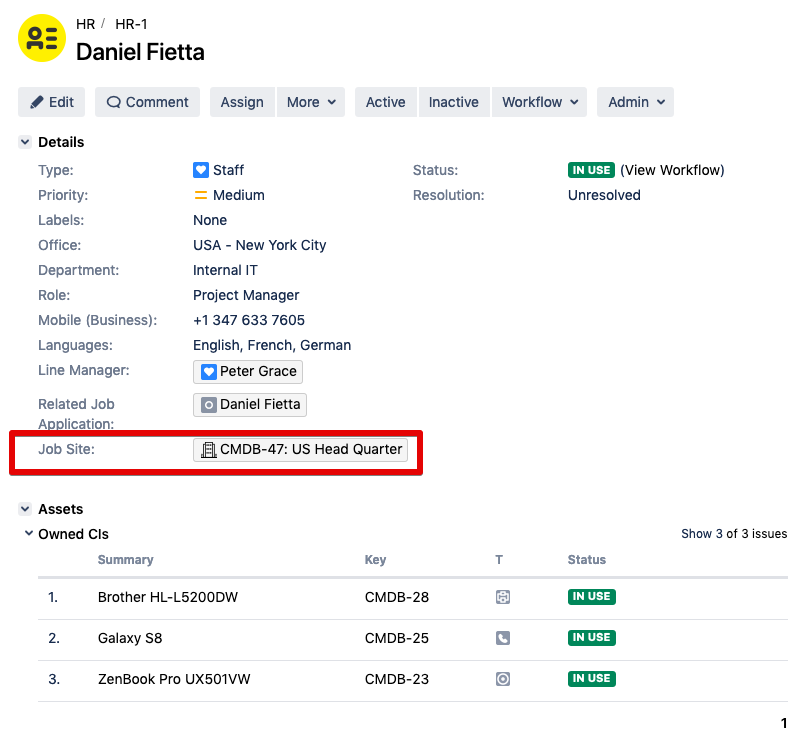
Starting with 1. The building where he is working, the special JQL function Issue in Relation is used as Data Logic to select the HR issue of the user and only the issues of the relations connected to it. With the restriction of type = building, only the value of "Job Site" can be selected now.
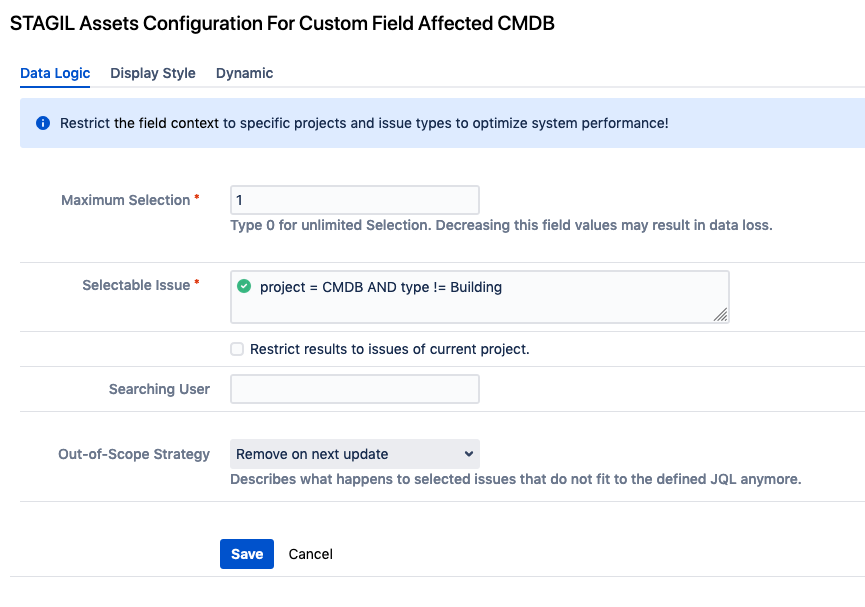
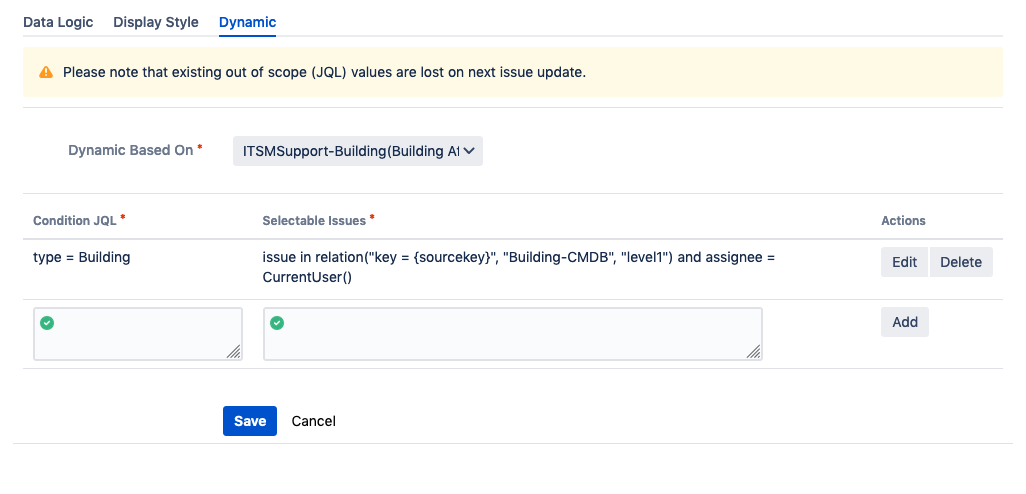
To configure 2. The assets which are assigned to him, the Data Logic needs to be based on all CMDB issue types except buildings.Now, the Dynamic is based on the relation ITSMSupport-Building(Building Affected) which the user selects first by creating the ticket. In this case, the Condition need to be issue type = building. The Selectable Issues are based on the issue selected before. The JQL goes into the relation which displays all CMDB of that specific building in the first level of the current user.
Manage Relations
To edit/create/delete relations you can use the overview page under app administration → STAGIL Assets → Relations:

If you delete a relation, then the related custom fields are deleted, too!